Cabinet Build
Material you’ll need:
Two 2 x 4 x 3/4 MDF Board
Two 2 x 4 x 1/2 Project Board
Circular Saw (you can also use a table saw)
Rip Jig
Tape Measure
Pocket Hole Jig and screws
Drawer Slides
Knobs
Wood Table Legs
When we lived in Salt Lake I had all of my pattern design supplies in one of those Ikea looking storage drawer units with my printer sitting on top. It worked really well but I always kept looking for a cabinet that would hide my printer, hold all my art supplies, and I wanted it to look like a piece of furniture. Once we moved to the North East my art supplies stayed in bags cluttering the floor in the corner of room for months. Im definitely one of those “how hard can it be” people and I really wanted to build my own custom cabinet that would fit everything and look good. This project had a lot of first for me. Ive never used anything more powerful then a drill. I also never built furniture from scratch. Im near pro level at building Ikea furniture but for this project I needed to know how much room was needed to fit the printer, how I was going to add a back without blocking the cords for the printer and how to make functioning drawers.
Part One and Part Two video tutorial are available.
Its Just A Box
I have been procrastinating on starting this project honestly out of fear and having discomfort in the unknown. I decided to break this project into small less intimidating steps. At the most basic level a cabinet is boxes inside a big box. Obviously there is more to it like drawer slides and making sure everything is at the right angle. The very first thing I needed to make was a big box for the body of the cabinet. I am going to be storing a lot of stuff in this cabinet including a heavy printer so the body of the cabinet needs to be thick enough to hold that weight. My local hardware store did not have 3/4 inch project board available. I ended up using MDF to build the body. I knew I was going to paint the cabinet so MDF would work fine. The only downside was how much heavier it is compared to other plywood.

My sizing for the cabinet centered around the printer. It is the biggest single object that needed to fit. To figure out the size I added one inch on each side of the printer for air flow. That gave my the inside dimensions for the printer drawer. I then added the thickness of the drawer as well as the drawer slides. That final number is the inside dimensions I need to make the cabinet. For the height of cabinet I wanted three to four regular drawers to hold all my other office things and art supplies.
To cut the MDF sheet I used my circular saw with a Rip Jig. It didnt take long to cut the four pieces for the cabinet body. I then took my pocket hole jig and drilled the top and bottom into the sides. I highly recommend having a fully charged drill. That might be a duh thing to you but I noticed a big difference with how much effort I had to use when my drill was half charged verses fully. Leaning the sides of the cabinet against a wall or better yet using a speed square to make sure your cabinet is perfectly square. This is the start for the entire project so it needs to be square or I would have ended up with issues adding drawers later. It only took me an afternoon to build the body of the cabinet.
Theres multiple ways to build drawer boxes and it really comes down to what tools you have available to you. To figure out the measurements I took the inside dimensions of the cabinet body and subtracted the space the drawer slides will take up. Once I knew that I measured how deep I wanted the drawer to be. I used two pieces of 2 x 4 x 1/2 project board to build the drawers. You can choose if you want your front and back to over lap or if you want the sides to overlap instead. I decided to use my rip jig and circular saw in the lowest blade setting. This allowed the saw to not cut fully through the plywood making a channel wide enough to slide the bottom panel in. To attach the sides of the drawer to the front and back I used two pocket holes on each end. Its never recommend to only use one pocket hole because it can cause splitting from the screw moving around.


To assemble the drawer together I connected the back and both side pieces together with pocket holes making a U shape. I then slid the bottom panel in sandwiching it between the three pieces. To finish it off I attached the front panel making sure the bottom piece was in and then used pocket holes to connect it to the sides. I repeated that five times only making the bottom drawer taller to accommodate the printer.
I messed up
Once the cabinet body and the drawers are made I now need to attach them together. I purchased a set of four soft close drawer slides for the four storage drawers (the printer will be slightly different hardware). A level and claps are going to be your best friend for putting the drawers up. Just like building the drawer boxes. Theres a lot of ways people say are ‘best’ for assembling drawer slides. I tried a few different ways but ultimately for me what worked best was attaching the slides to the drawer box and then using clamps and the level to place it exactly where I wanted it. Putting on these drawers was not the hard but it was not my favorite part and required a lot of awkward fits to be able to drill the slides into the cabinet body.
This was such an exciting moment once the drawers where in. It was the first time the cabinet looked the start of what Ive been picturing in my mind for years and the best part…all the drawers function! Next I needed to put face covers on the drawers. A face cover is the ‘pretty’ front of any drawer. This is where the second 2 x 4 x 3/4 MDF panel comes in. Originally I thought about having a face frame and having the drawer front nestled in. I messed up big not thinking this fully through and it wasn’t until after a cut my panel that I realized my mistake. When cutting the drawer face I didn’t account for the drawer slides when I measured. So when I did a dry fit with the cabinet front framing I realized it blocked the drawer slides from opening.

After another harware store run for a new 2 x 4 x 3/4 panel I started correctly* cutting it to fit the drawers. I scrapped the idea of having the drawer face framed and decided to make the drawer fronts cover the entire front of the cabinet box. It create a more modern and clean look plus the drawers actually worked correctly which was good. The home stretch was here now. The cabinet functioned so now it is time to make it pretty. I grabbed a few paint swatches to bring home as well as ordered some brass knobs. In the end Espresso by Benjamin Moore was the winner. Its the perfect chocolate brown color and brought in so much warm and depth. I added two brass knobs per drawer that pop perfectly against the paint color. Add knobs was super easy with my little jig that helps you line up your hole perfectly on each drawer. To make it look like a piece of furniture instead of a supply cabinet I looked are my local hardware stores options for wooden legs. Its already a pretty big cabinet so I knew I wanted low legs in a classic style that almost make it look antique.
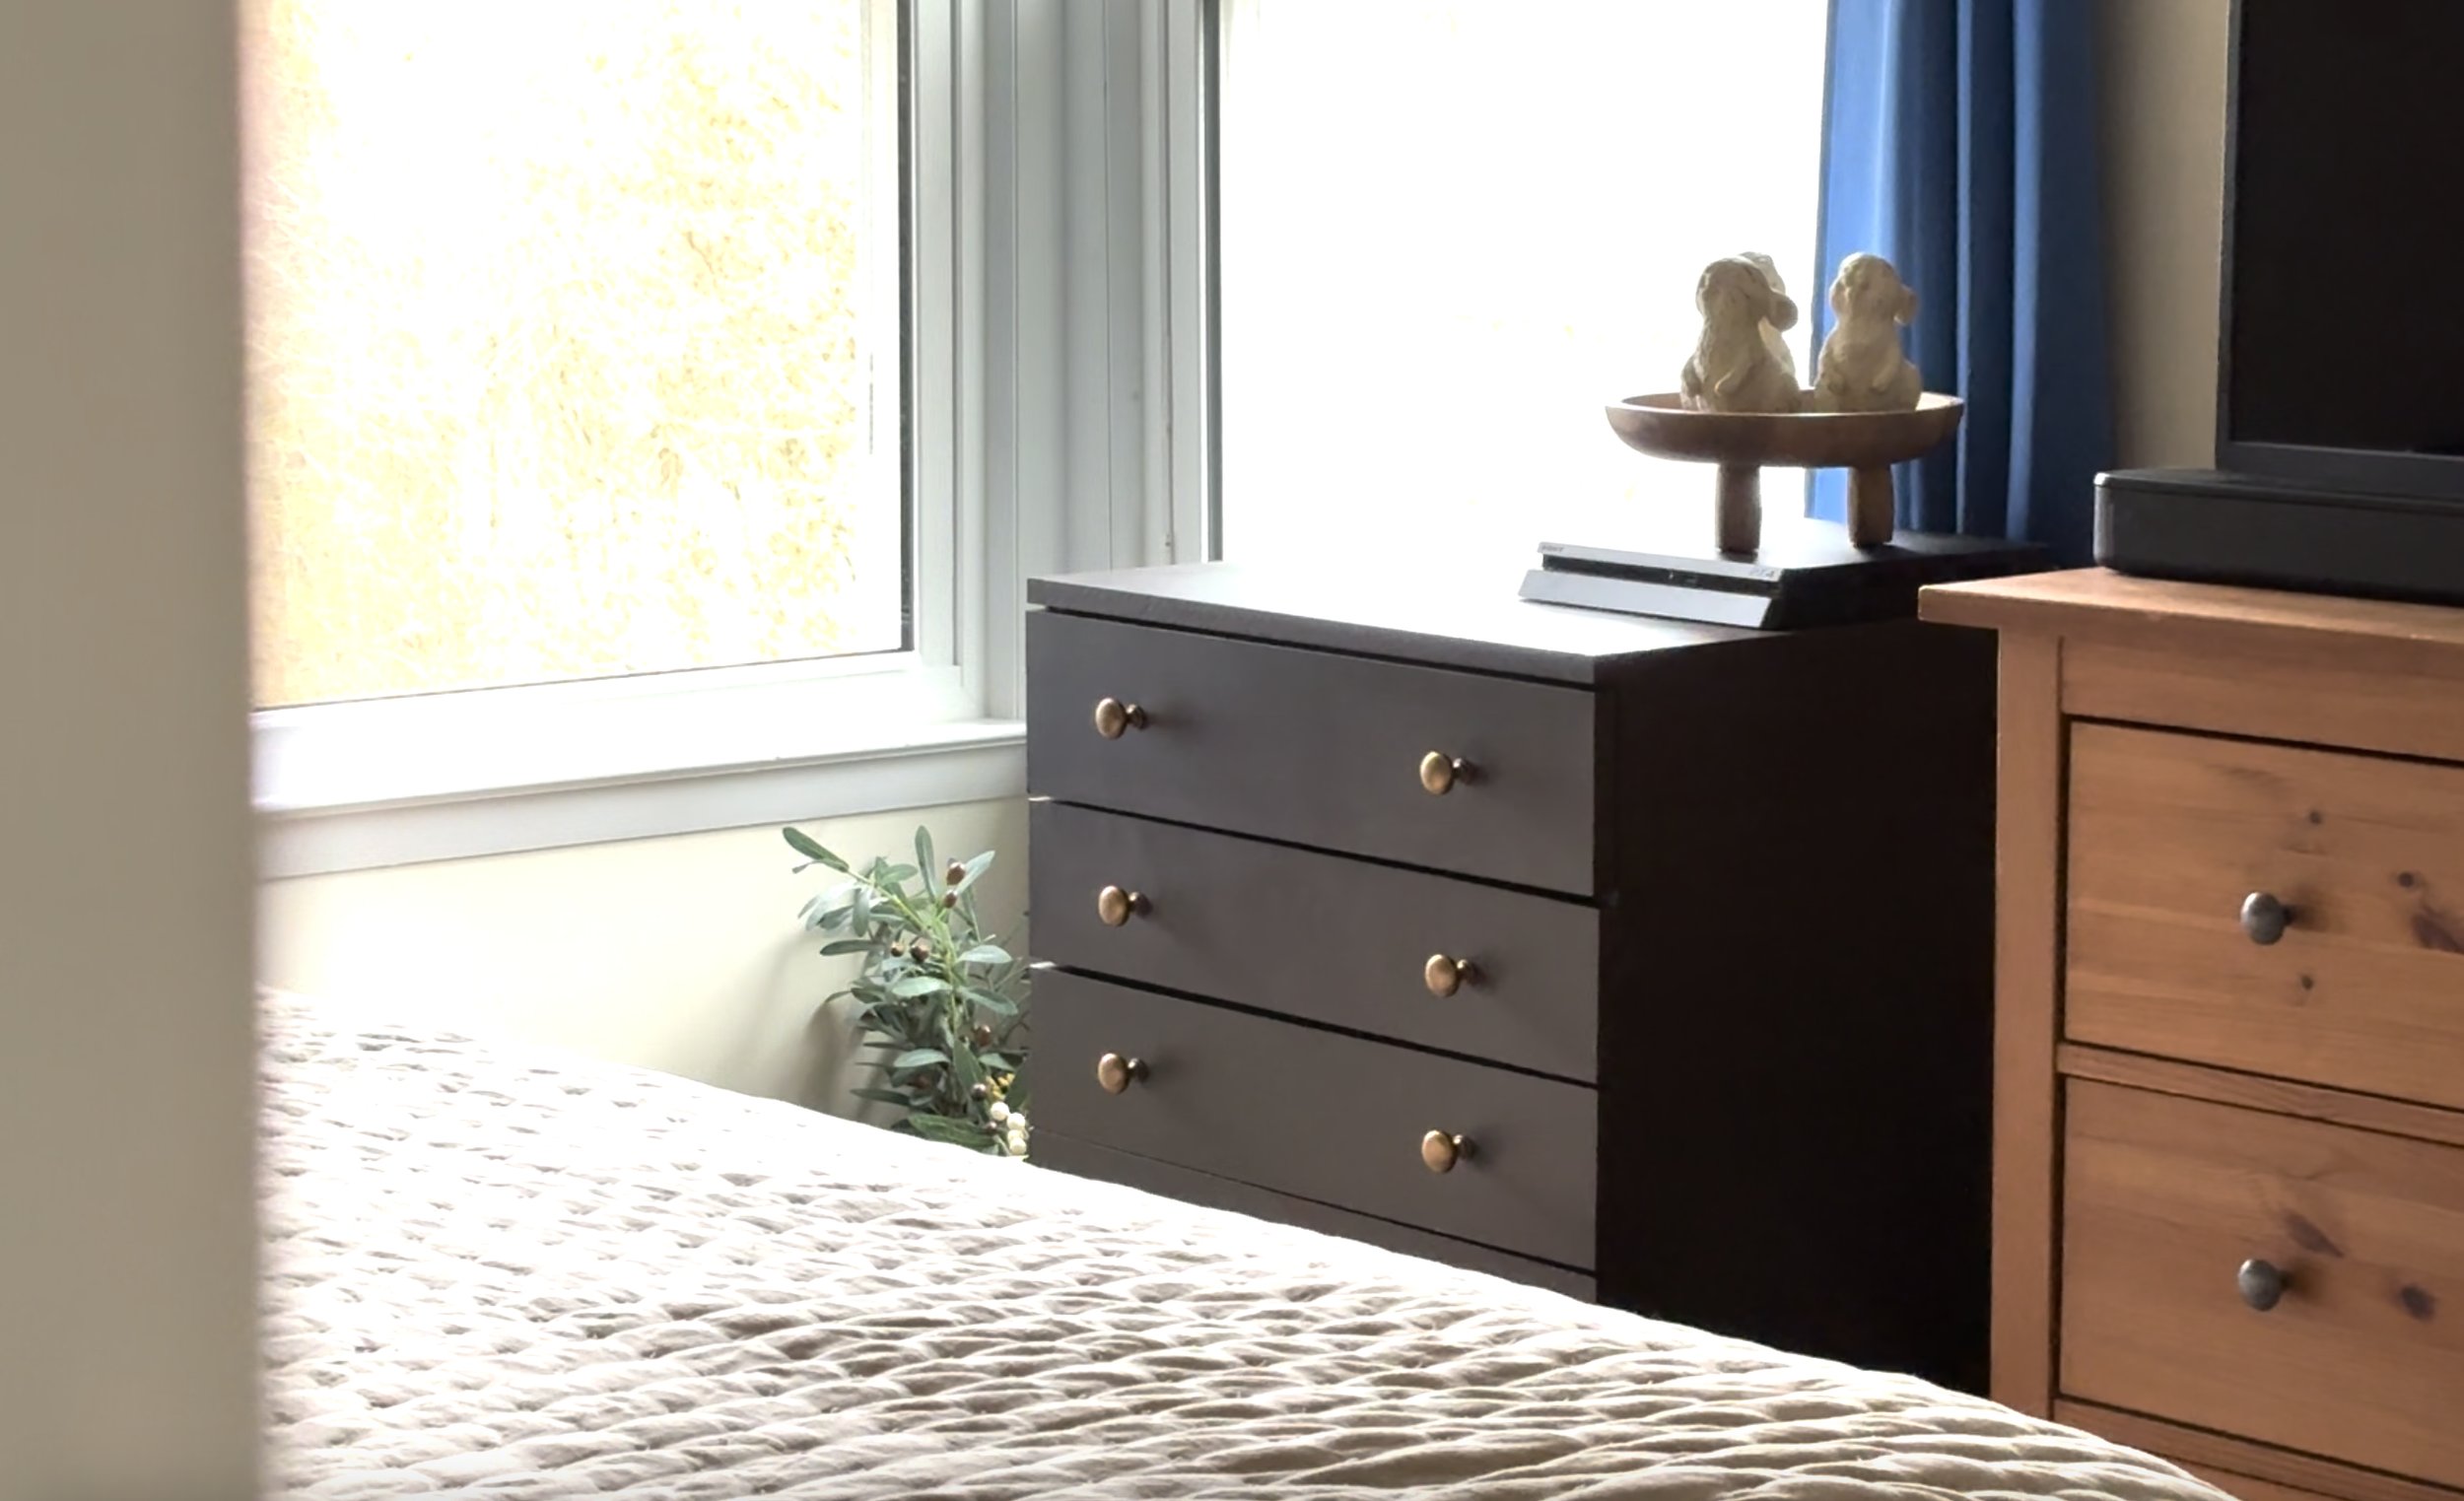
Im so happy with how this cabinet turned out. It not perfect but it holds everything I wanted and more. My printer is no longer an eye sore but I can still easily access it when I need. The corner of our room that once was covered in supplies, decor and general office supplies. I learned so much while building this cabinet. I feel so much more confident going to my future projects especially any building ones. As a bonus my cat Stella has taken a love to the cabinet as well. She loves the height for her bird and bunny watching needs.

