Sewing: Pipping Pillow
Tools Used:
Sewing Machine (or you can hand sew)
Sewing Pipping
Fabric of your choice
Matching Thread
Clips or Pins

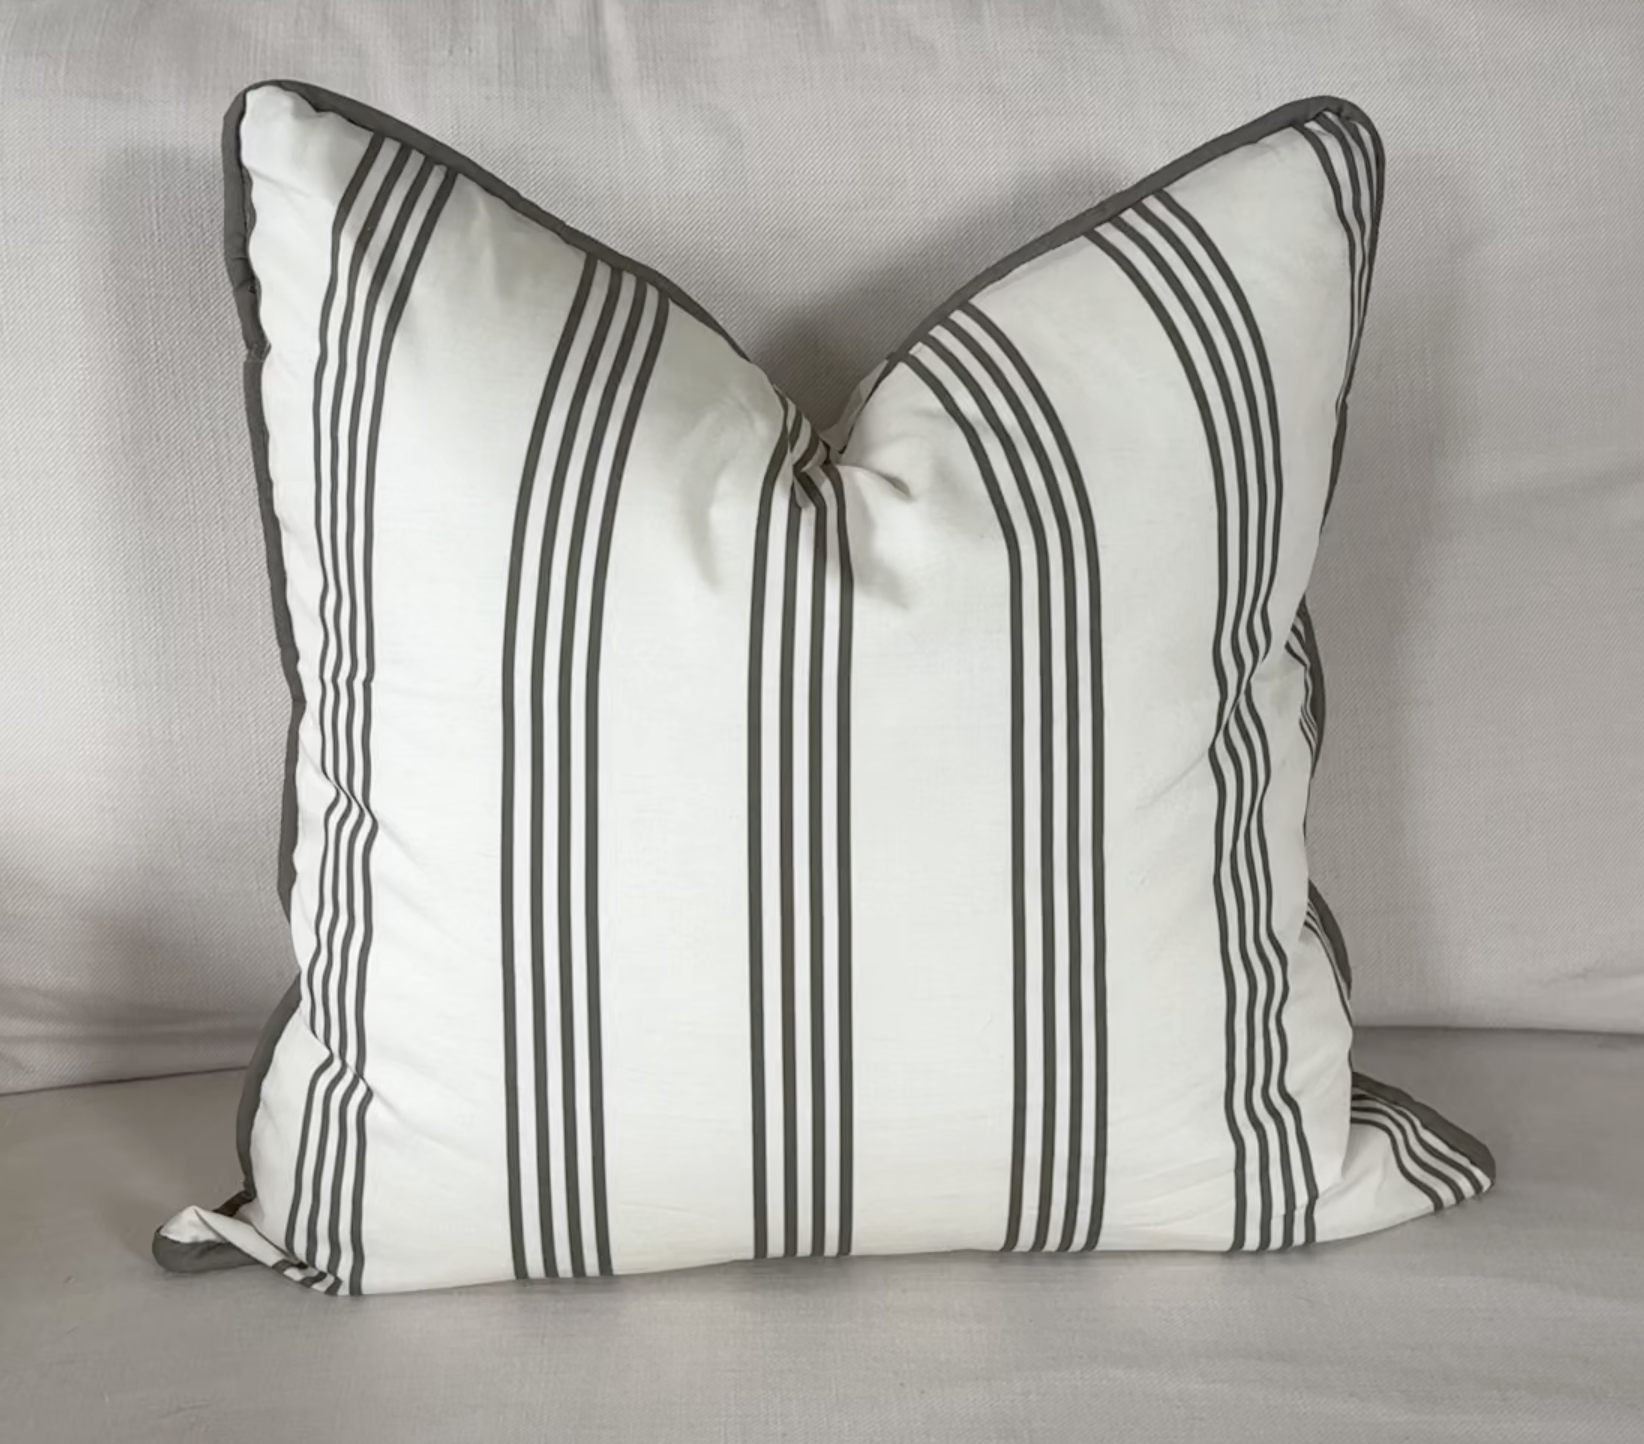
The pipped pillow case is a classic design that has been redesigned in a fun way recently with contrasting fabric and double pipping. You can also customize the thickness of pipping used to make the accent more or less prominent. If you are a visual learner here is a video of me making this pillow case and two others!
To start you can use a pillow case you already have or measure your pillow insert. For the maximum fullness out of your insert make your case a size down. For example a 22x22 pillow insert should have a 20x20 pillow case. You can also make your case the exact same size as your insert for a less full look.
Cutting Body
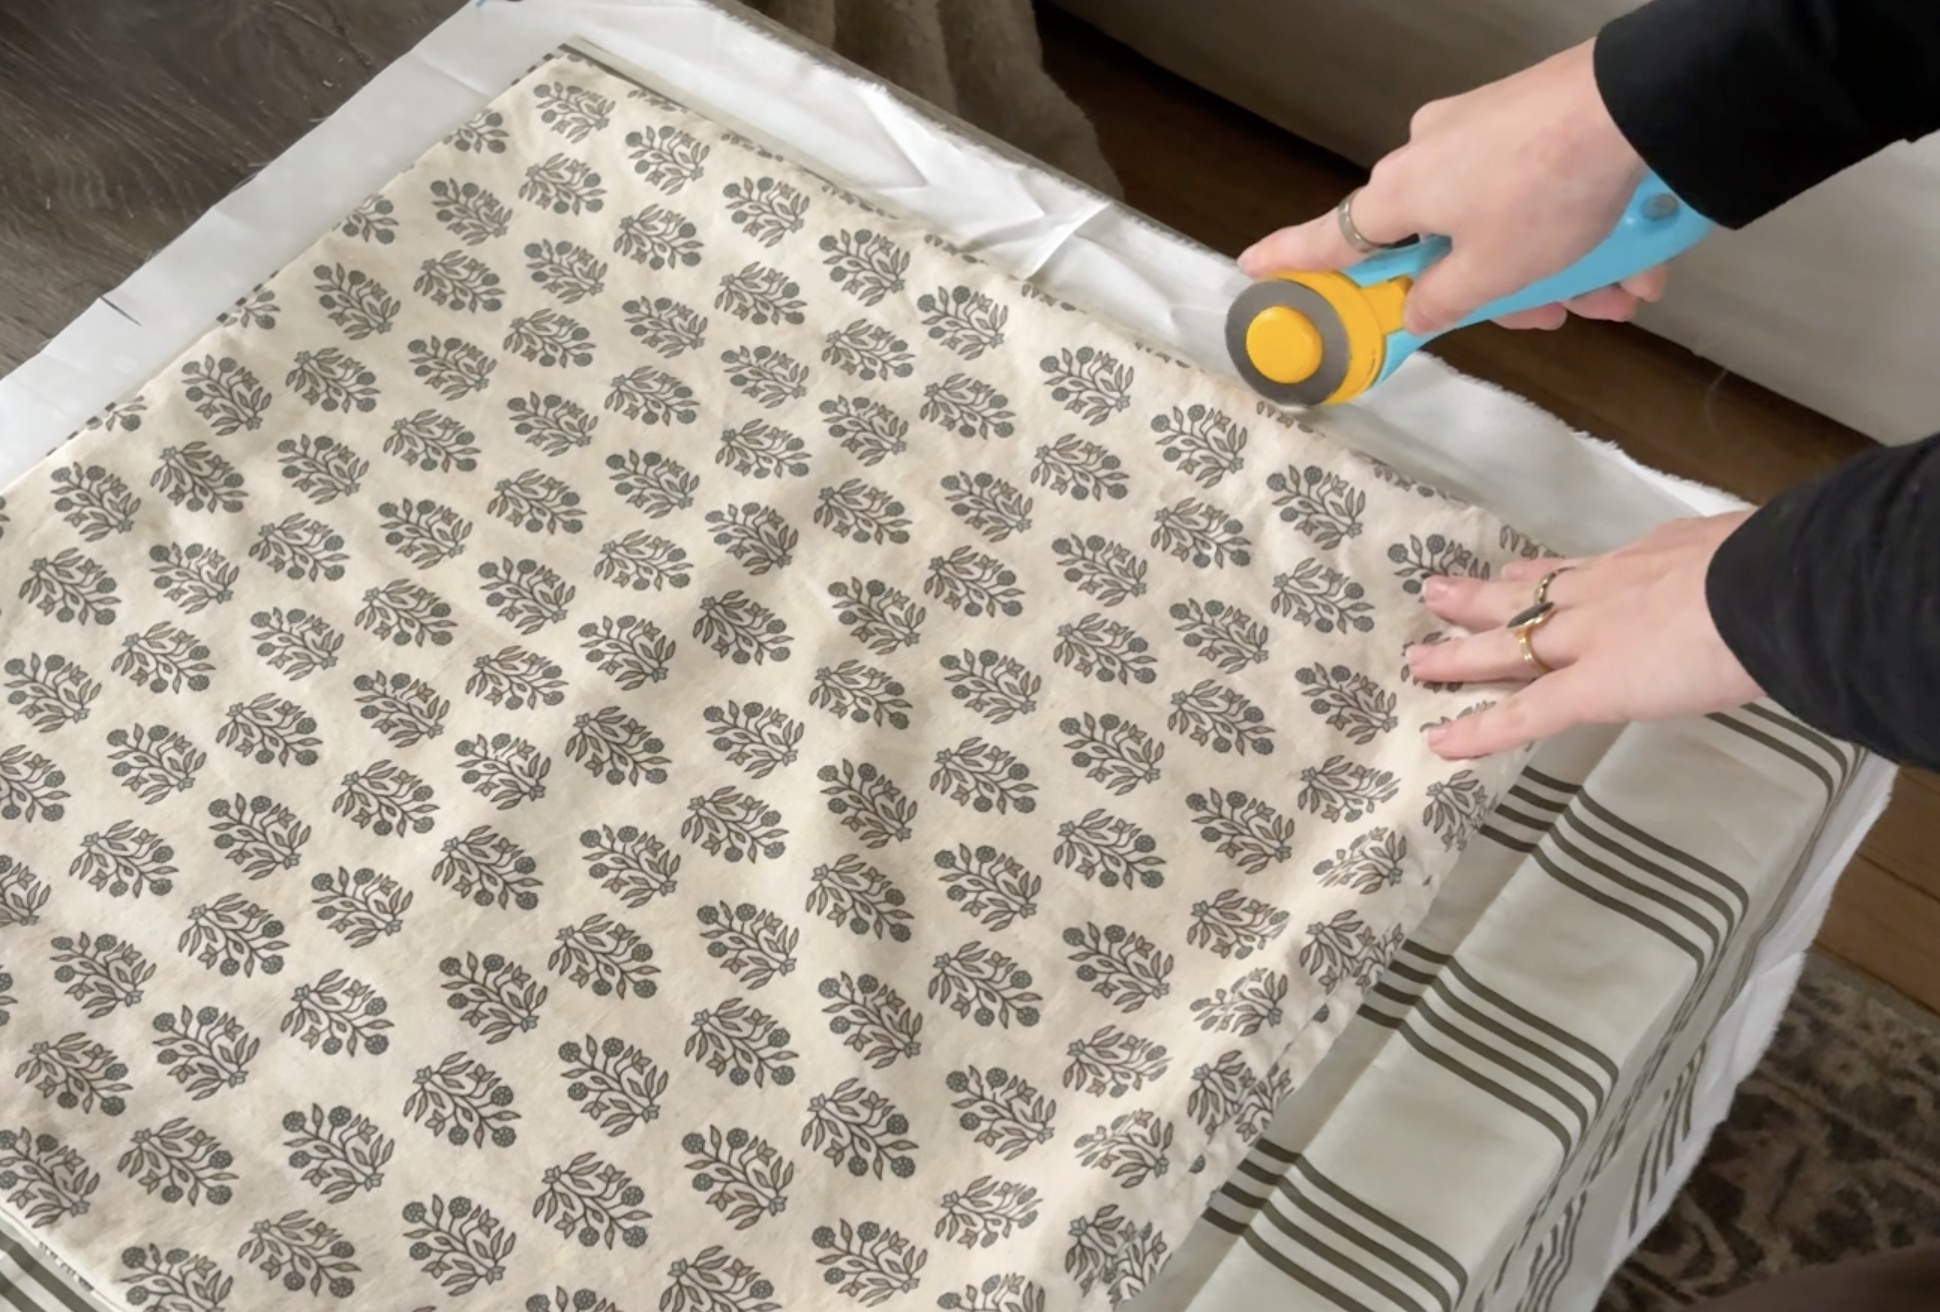
I used one of my other pillow covers to cut my fabric, adding an extra 1/2 seam allowance all the way around. Your boarder will be a separate piece so when cutting this section keep in mind it is only covering the body of the pillow. You will need two matching pieces for the front and back of your pillow case.
Color Combos
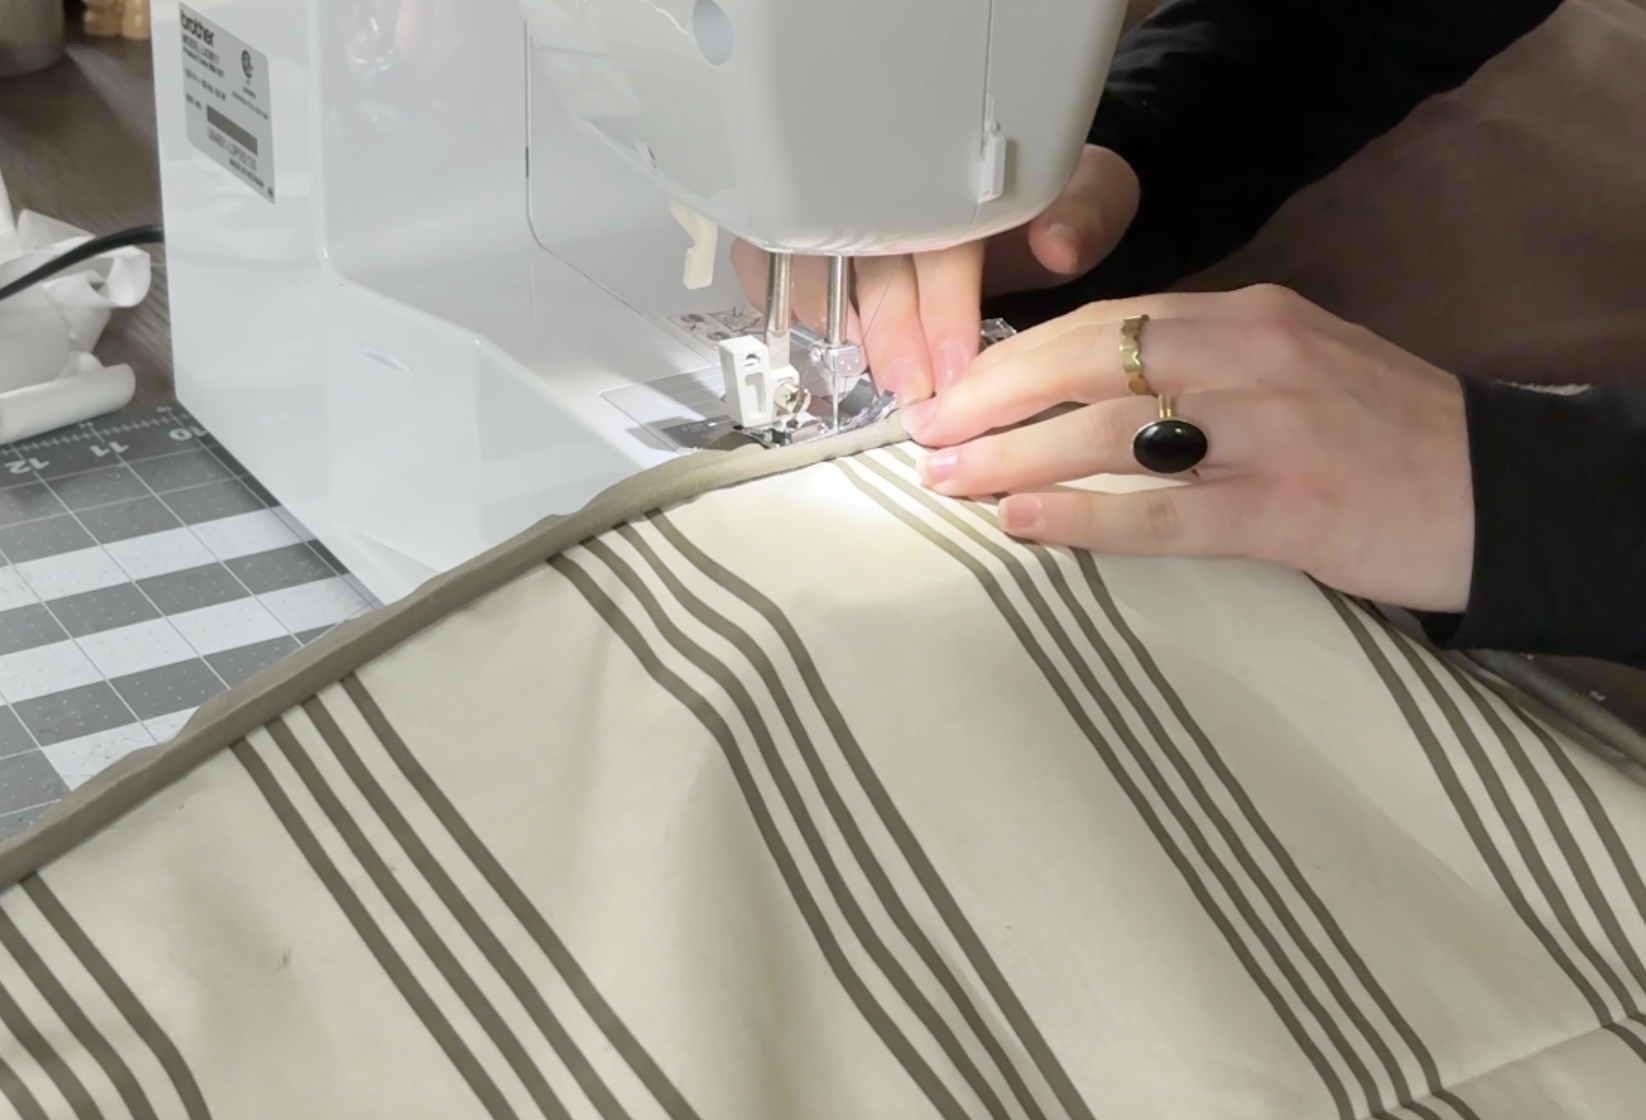
You can either use the same fabric as your body to make a pipping that disappears or use a color within the main fabric or opposite of it in the color wheel to add contract to your pillowcase. For my pillowcase I used the same green in the triple striped fabric. To make pipping use a strip of your desired fabric. It needs to be wide enough to wrap around your pipping and have a half inch seam allowance. For tight pipping I like using a zipper foot or placing my needle as far to the side as possible. This allows the needle to sew right up against the pipping making a tight fit.
Attach the pipping the the front pillowcase piece. Make sure the pipping it facing in against the right side of the fabric. Using matching fabric sew the pipping to the front pillowcase fabric. For clean corners cut three to four relief cuts in the seam allowance making sure to not cut the thread. This will let to fabric bend easier around the corners.

Attach and Finish
Once your pipping is connected to the front piece of your pillowcase it time to connect the back and add your closer. For this pillowcase I used an invisible zipper attached behind the pipping. Doing it this way helps hide the zipper even more. If you choose to use a stripped fabric like I did lay it out and try to match the front and back fabric pieces. Its the little details like that can take a handmade sewing project up a level. I also cut the front and back pieces with one of the stripes in the center.